팀 블로그 또는 문서화를 위해 Docusaurus를 사용하는 방법을 정리하려고 한다.
설치
공식 홈페이지에 들어가서 최신 버전을 설치한다.
yarn create docusaurus
배포
배포 안내 문서
netlify나 vercel 같은 서버리스 플랫폼을 추천하고 있고, 간단하고, 빠른 시간 안에 배포를 할 수 있다.
이 글에서는 github pages를 이용해서 배포하는 방법을 설명한다.
레포지토리 생성
github pages를 이용하려면 예시와 같이 username.github.io 형태의 레포지토리를 생성해야 한다.
이때 organization을 사용하는 경우 organization.github.io 형태의 레포지토리를 생성해서 사용한다.
설정 파일 수정
module.exports = {
  // ...
  url: 'https://greeng00se.github.io',
  baseUrl: '/',
  projectName: 'greeng00se.github.io',
  organizationName: 'greeng00se',
  trailingSlash: false,
  // ...
};
토큰 설정
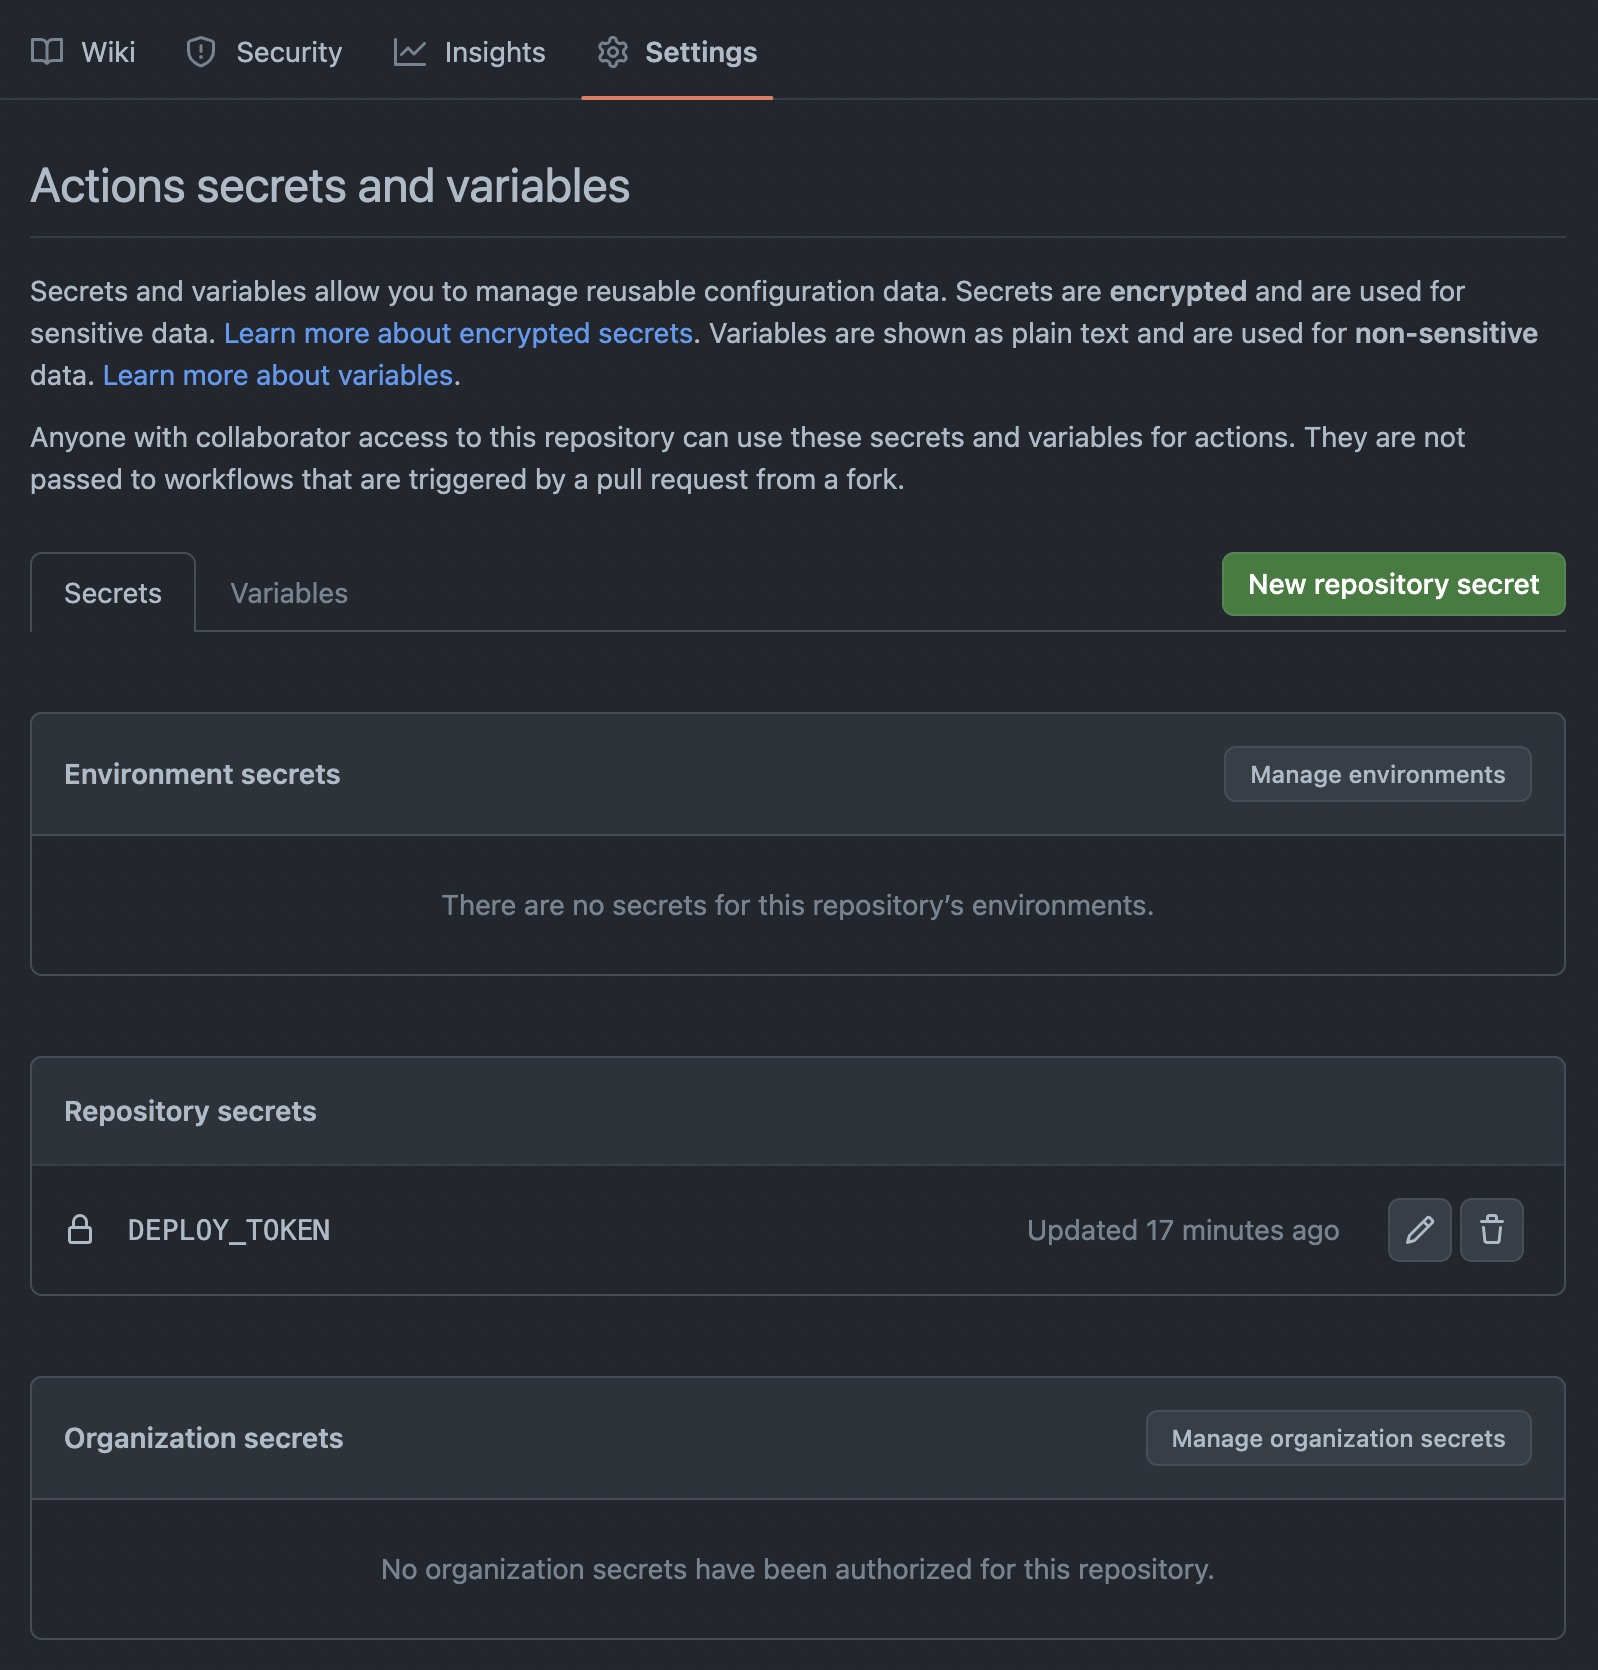
github action을 위해 배포용 토큰을 하나 생성하여 생성한 레포지토리에 Repository secrets으로 설정한다.
이 글에서는 토큰을 클래식 방식으로 생성했고 스코프는 [repo, user, workflow] 을 설정했다.
브랜치 생성
github에서 gh-pages 브랜치를 하나 생성한다.
repository -> settings -> pages -> branch에서 생성한 gh-pages로 브랜치를 변경한다.
설정한 브랜치가 배포 브랜치가 되며, 해당 브랜치에 있는 파일들을 이용해서 정적 웹사이트를 제공한다.
워크플로 작성
Docusaurus 2.0 기준 Node.js 16.14 이상의 버전을 사용해야 합니다.
배포시에는 Repository secrets으로 설정한 DEPLOY_TOKEN 을 이용합니다.
name: blog

on:
  push:
    branches: [main]

jobs:
  deploy:
    name: Deploy to GitHub Pages
    runs-on: ubuntu-latest
    steps:
      - uses: actions/checkout@v2
      - uses: actions/setup-node@v3
        with:
          node-version: 18
          cache: yarn

      - name: Install dependencies
        run: yarn install --frozen-lockfile
      - name: Build website
        run: yarn build

      - name: Deploy to GitHub Pages
        uses: peaceiris/actions-gh-pages@v3
        with:
          github_token: ${{ secrets.DEPLOY_TOKEN }}
          publish_dir: ./build
          user_name: github-actions[bot]
          user_email: 41898282+github-actions[bot]@users.noreply.github.com
댓글 기능
giscus를 이용하여 댓글 기능을 추가한다.
giscus 설정
- 공개 저장소여야 한다.
- giscus 앱이 설치되어 있어야 한다.
- Discussions 기능이 해당 저장소에서 활성화되어 있어야 한다.
자세한 내용은 giscus를 확인하자.
docusaurus 설정
swizzling을 이용하여 컴포넌트를 감싼다.
기존에 게시물을 giscus가 포함된 리액트 컴포넌트로 감싸는 형태가 된다.
아래 명령어를 이용하여 BlogPostItem을 추출할 수 있다.
yarn run swizzle @docusaurus/theme-classic BlogPostItem -- --wrap
명령어를 입력하면 /src/theme/BlogPostItem/index.js 위치에 파일이 생성된다.
파일의 내용을 아래와 같이 수정하고, 이때 setAttribute 부분은 적절하게 자신의 giscus 설정을 이용한다.
import OriginalBlogPostItem from "@theme-original/BlogPostItem";
import React, { useEffect, useRef } from "react";
// @ts-expect-error internal code
import { useColorMode } from "@docusaurus/theme-common";
import { useBlogPost } from "@docusaurus/theme-common/internal";

const giscusSelector = "iframe.giscus-frame";

function BlogPostItem(props) {
  const { colorMode } = useColorMode();
  const { isBlogPostPage } = useBlogPost();
  const giscusTheme = colorMode === "dark" ? "dark" : "light";
  const containerRef = useRef(null);

  useEffect(() => {
    if (!isBlogPostPage) return;

    const giscusEl = containerRef.current.querySelector(giscusSelector);

    const createGiscusEl = () => {
      const script = document.createElement("script");

      script.src = "https://giscus.app/client.js";
      script.setAttribute("data-repo", "teco-chat/teco-chat.github.io");
      script.setAttribute("data-repo-id", "R_kgDOJZ5j0Q");
      script.setAttribute("data-category", "Announcements");
      script.setAttribute("data-category-id", "DIC_kwDOJZ5j0c4CXS_Q");
      script.setAttribute("data-mapping", "pathname");
      script.setAttribute("data-strict", "0");
      script.setAttribute("data-reactions-enabled", "1");
      script.setAttribute("data-emit-metadata", "0");
      script.setAttribute("data-input-position", "bottom");
      script.setAttribute("data-theme", giscusTheme);
      script.setAttribute("data-lang", "ko");
      script.crossOrigin = "anonymous";
      script.async = true;

      containerRef.current.appendChild(script);
    };

    const postThemeMessage = () => {
      const message = {
        setConfig: {
          theme: giscusTheme,
        }
      };

      giscusEl.contentWindow.postMessage({ giscus: message }, "https://giscus.app");
    };

    giscusEl ? postThemeMessage() : createGiscusEl();
  }, [giscusTheme]);

  return (
    <>
      <OriginalBlogPostItem {...props} />
      {isBlogPostPage && <div ref={containerRef} />}
    </>
  );
}

export default BlogPostItem;
알고리아 설정 및 직접 관리하기
알고리아를 사용하면 검색 기능을 추가할 수 있다.
유료 플랜이나 netlify를 사용하는 경우 크롤러를 따로 제공해 주는 것 같다.
무료 플랜은 직접 인덱스를 수집하는 방법과, docsearch를 이용하는 방법이 있다.
docsearch에 등록한다면 일주일에 한 번씩 크롤링이 진행된다.
이 글에서는 직접 인덱스를 수집하는 방법을 사용한다.
알고리아 애플리케이션 생성 및 키 확인
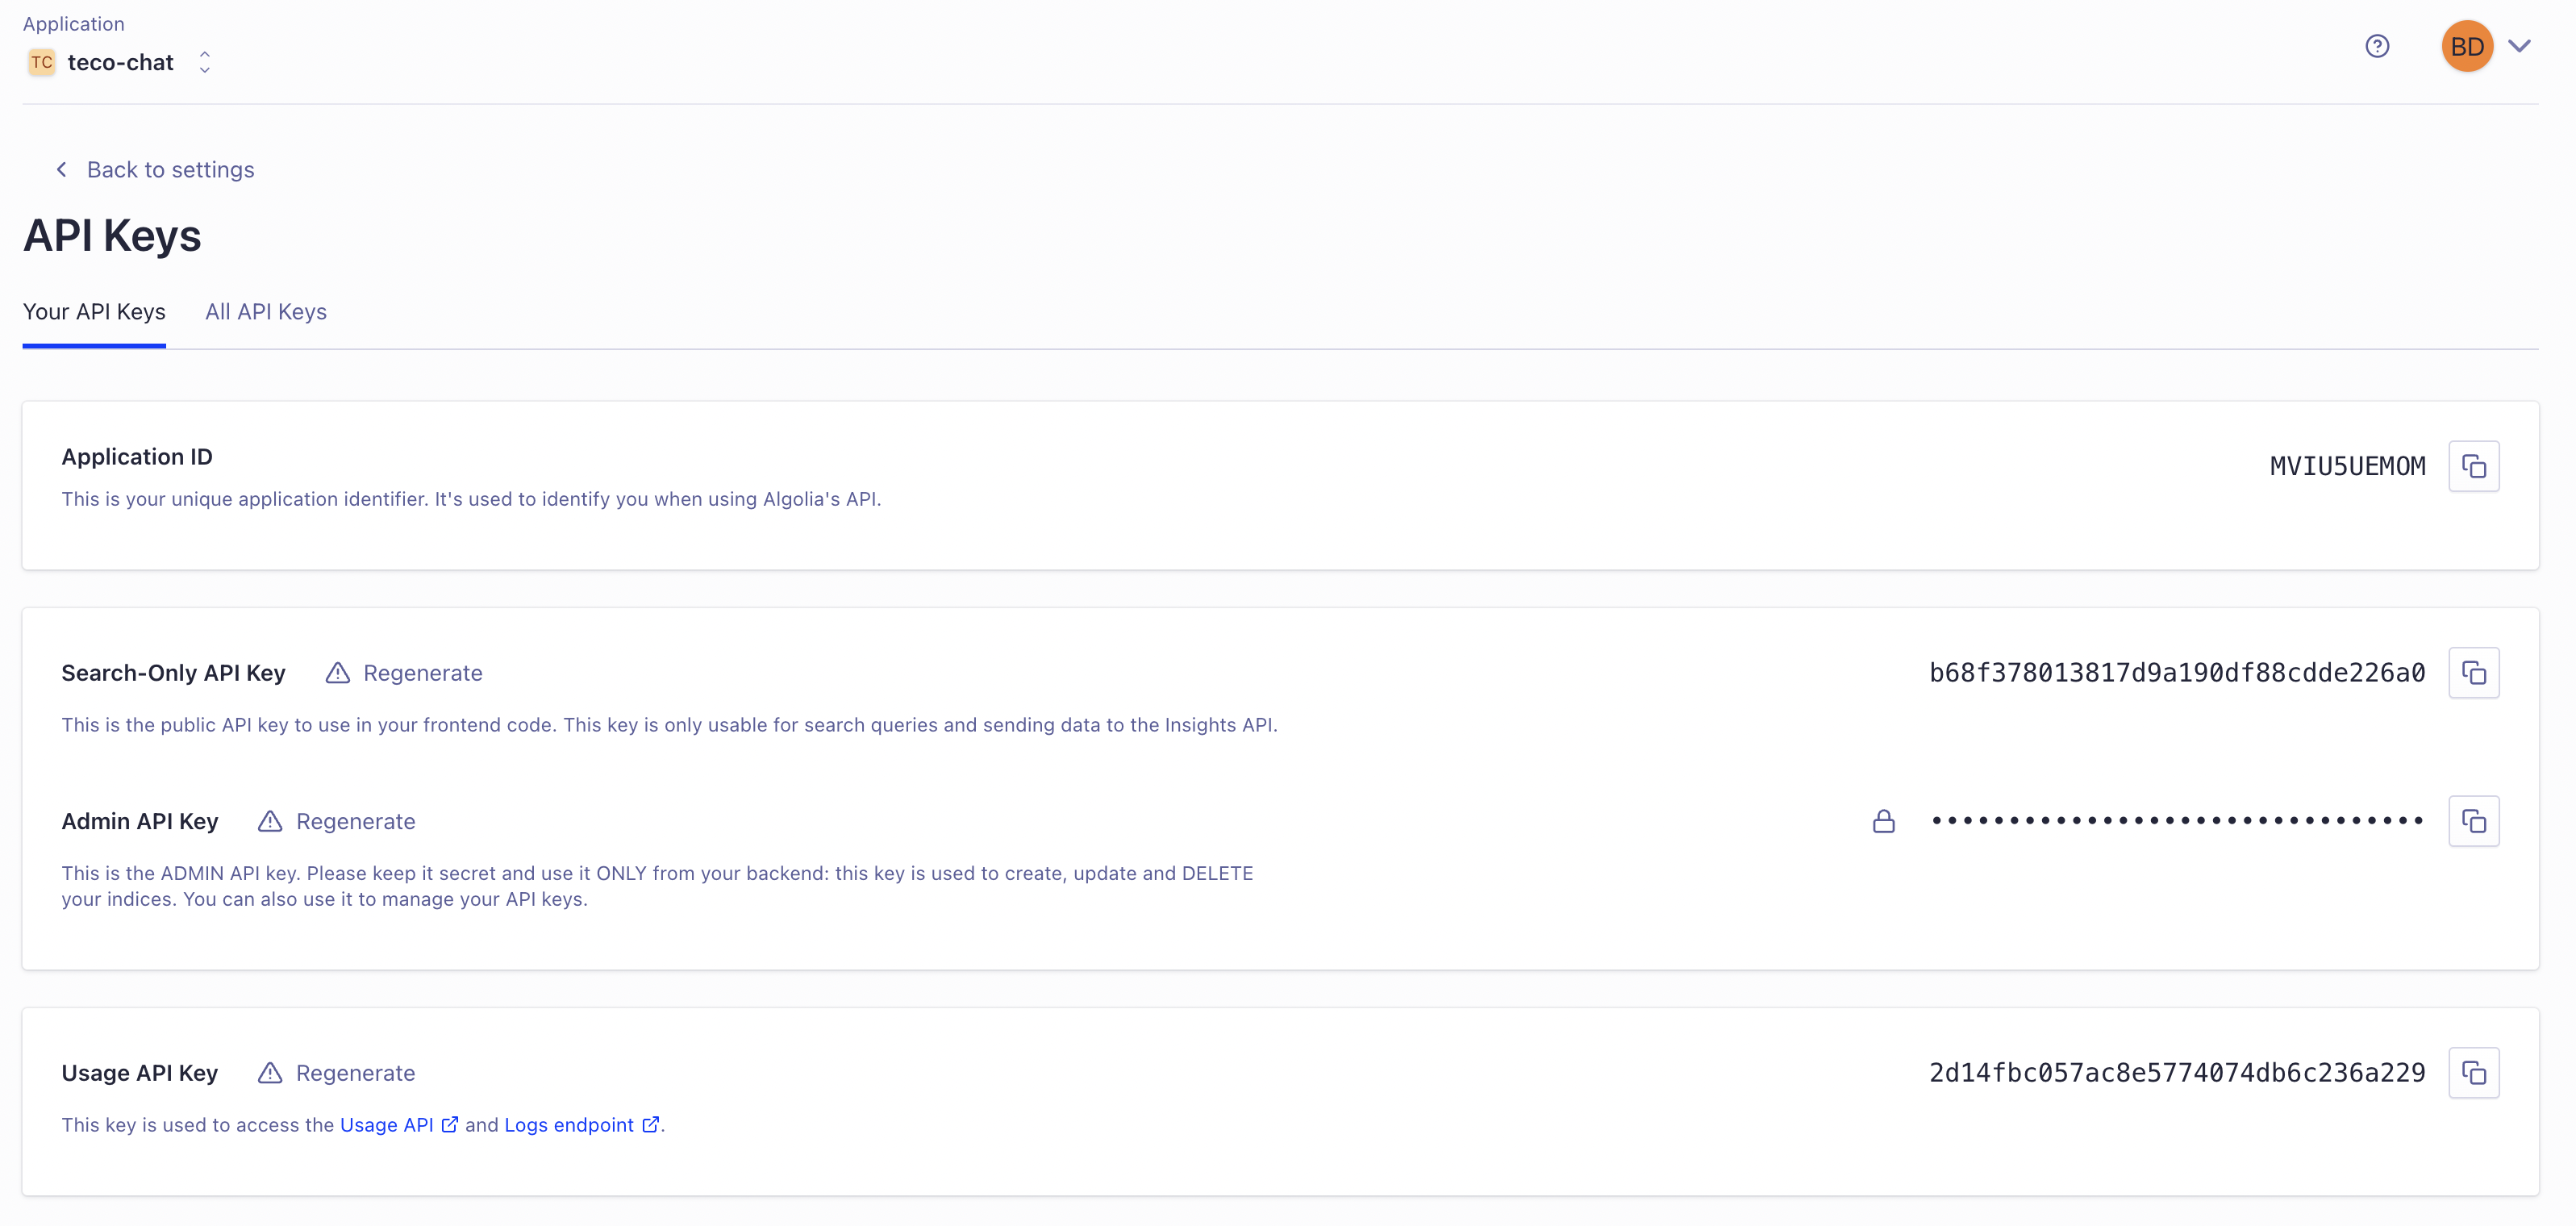
회원가입을 하고 새로운 애플리케이션 생성을 누른다.
생성을 다 마치면 다음과 같이 api 키를 확인할 수 있다.
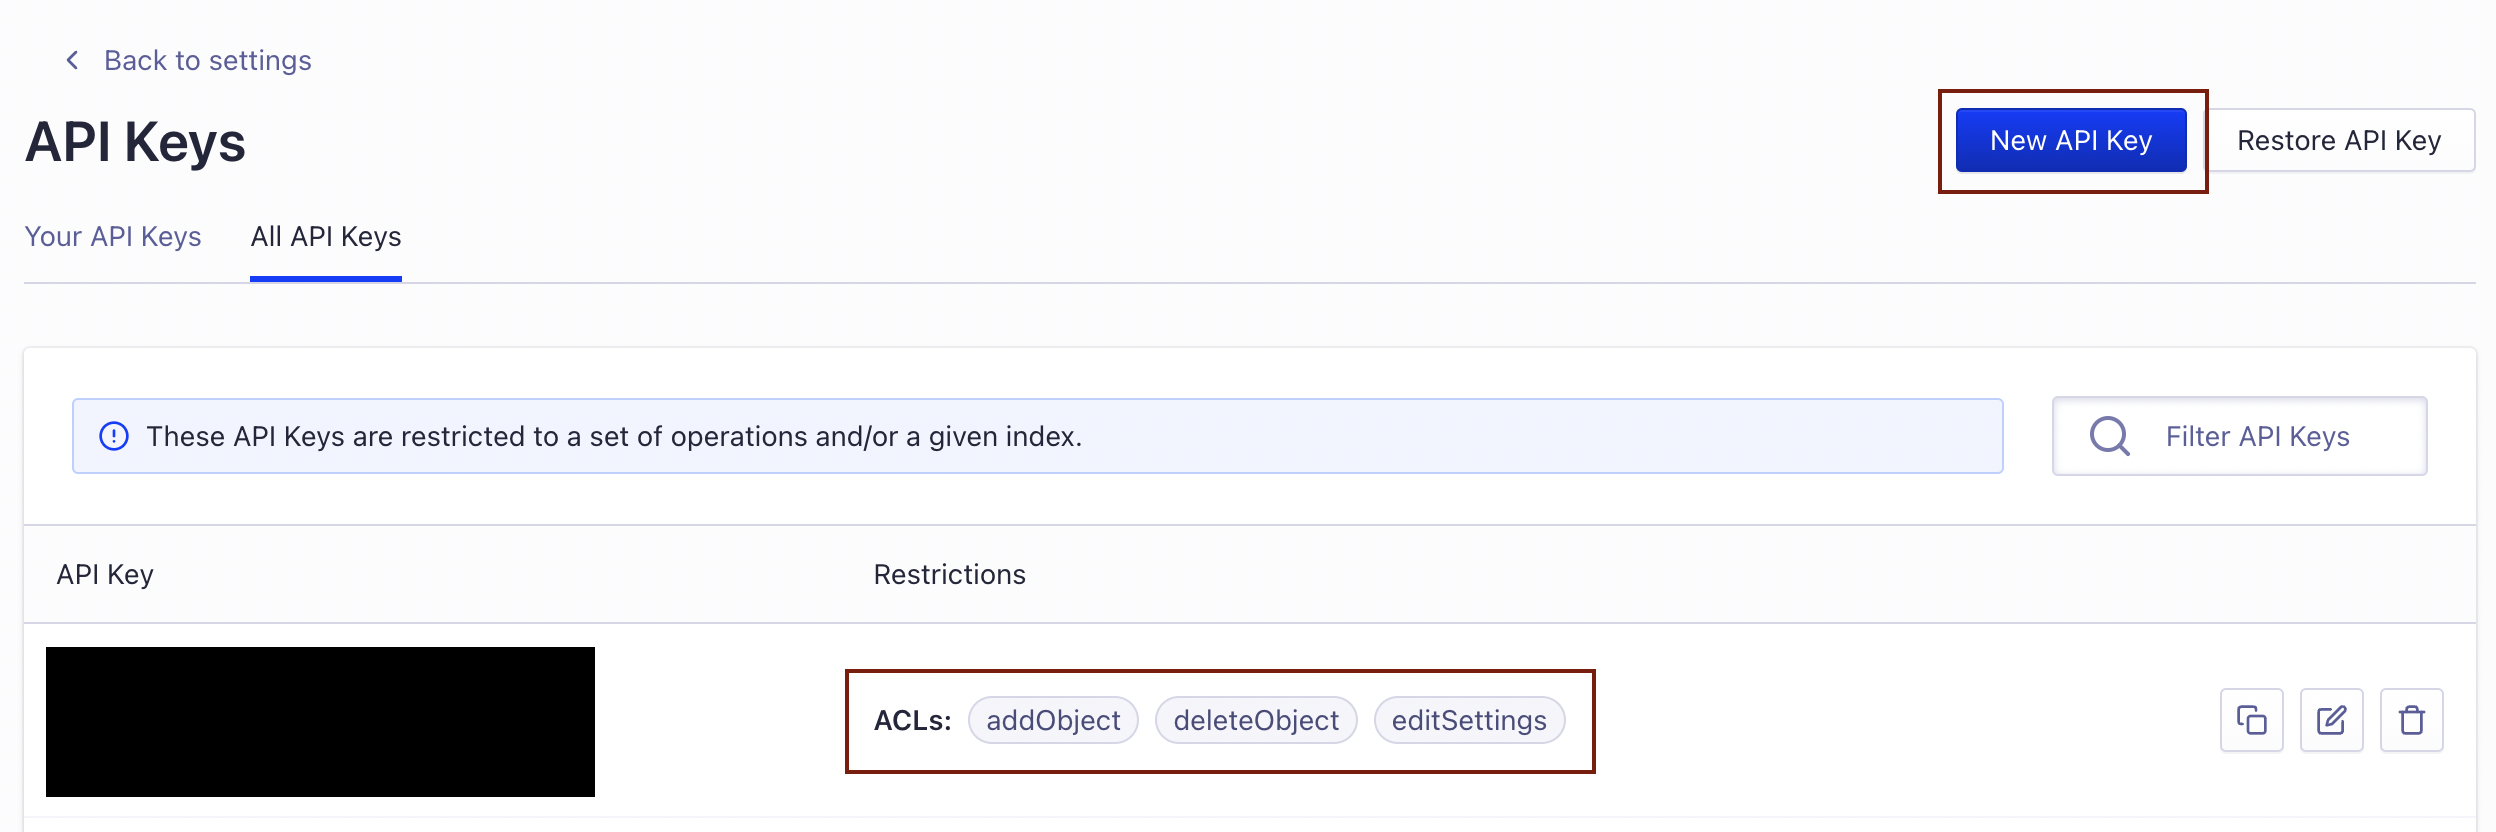
키 생성
직접 인덱스를 수집하기 위한 키를 생성한다.
addObject, editSettings, deleteIndex acl(접근 제어 목록)이 있으면 된다.
.env 파일 생성
프로젝트 폴더 상단에 .env 파일을 생성한다.
APPLICATION_ID=MVIU5UEMOM
API_KEY=인덱스_생성용_키
config 파일 생성
마찬가지로 최상단에 config.json 파일을 생성한다.
설정 파일은 해당 링크를 참고한다.
또는 Docusaurus의 설정 파일을 참고한다.
{
  "index_name": "teco",
  "start_urls": [
    "https://teco-chat.github.io/"
  ],
  "sitemap_urls": [
    "https://teco-chat.github.io/sitemap.xml"
  ],
  "sitemap_alternate_links": true,
  "stop_urls": [
    "/tests"
  ],
  "selectors": {
    "lvl0": {
      "selector": "(//ul[contains(@class,'menu__list')]//a[contains(@class, 'menu__link menu__link--sublist menu__link--active')]/text() | //nav[contains(@class, 'navbar')]//a[contains(@class, 'navbar__link--active')]/text())[last()]",
      "type": "xpath",
      "global": true,
      "default_value": "Documentation"
    },
    "lvl1": "header h1",
    "lvl2": "article h2",
    "lvl3": "article h3",
    "lvl4": "article h4",
    "lvl5": "article h5, article td:first-child",
    "lvl6": "article h6",
    "text": "article p, article li, article td:last-child"
  },
  "strip_chars": " .,;:#",
  "custom_settings": {
    "separatorsToIndex": "_",
    "attributesForFaceting": [
      "language",
      "version",
      "type",
      "docusaurus_tag"
    ],
    "attributesToRetrieve": [
      "hierarchy",
      "content",
      "anchor",
      "url",
      "url_without_anchor",
      "type"
    ]
  },
  "conversation_id": [
    "833762294"
  ],
  "nb_hits": 46250
}
docker 이용하여 크롤링
docker와 jq가 필요하다.
jq가 설치되어 있지 않으면 mac 기준 brew를 이용해서 설치할 수 있다.
brew install jq
다음 명령어를 이용하여 .env와 config.json을 이용하여 크롤링을 한다.
docker run -it --env-file=.env -e "CONFIG=$(cat ./config.json | jq -r tostring)" algolia/docsearch-scraper
docusaurus 설정
전에 확인한 APP ID, Search-Only API KEY, IndexName을 이용하여 docusaurus.config 파일에 설정한다.
themeConfig:
  /** @type {import('@docusaurus/preset-classic').ThemeConfig} */
  ({
    ...
    algolia: {
      appId: 'MVIU5UEMOM', // Application ID
      apiKey: 'b68f378013817d9a190df88cdde226a0', // Search-Only API Key
      indexName: 'teco', // config.json에 설정한 인덱스명
      contextualSearch: true,
    },
  })
부가 설정
화면 상단 Github Icon
파일 최하단에 아래 css 구문을 추가한다.
.header-github-link:hover {
  opacity: 0.6;
}

.header-github-link:before {
  content: '';
  width: 24px;
  height: 24px;
  display: flex;
  background: url("data:image/svg+xml,%3Csvg viewBox='0 0 24 24' xmlns='http://www.w3.org/2000/svg'%3E%3Cpath d='M12 .297c-6.63 0-12 5.373-12 12 0 5.303 3.438 9.8 8.205 11.385.6.113.82-.258.82-.577 0-.285-.01-1.04-.015-2.04-3.338.724-4.042-1.61-4.042-1.61C4.422 18.07 3.633 17.7 3.633 17.7c-1.087-.744.084-.729.084-.729 1.205.084 1.838 1.236 1.838 1.236 1.07 1.835 2.809 1.305 3.495.998.108-.776.417-1.305.76-1.605-2.665-.3-5.466-1.332-5.466-5.93 0-1.31.465-2.38 1.235-3.22-.135-.303-.54-1.523.105-3.176 0 0 1.005-.322 3.3 1.23.96-.267 1.98-.399 3-.405 1.02.006 2.04.138 3 .405 2.28-1.552 3.285-1.23 3.285-1.23.645 1.653.24 2.873.12 3.176.765.84 1.23 1.91 1.23 3.22 0 4.61-2.805 5.625-5.475 5.92.42.36.81 1.096.81 2.22 0 1.606-.015 2.896-.015 3.286 0 .315.21.69.825.57C20.565 22.092 24 17.592 24 12.297c0-6.627-5.373-12-12-12'/%3E%3C/svg%3E")
    no-repeat;
}

html[data-theme='dark'] .header-github-link:before {
  background: url("data:image/svg+xml,%3Csvg viewBox='0 0 24 24' xmlns='http://www.w3.org/2000/svg'%3E%3Cpath fill='white' d='M12 .297c-6.63 0-12 5.373-12 12 0 5.303 3.438 9.8 8.205 11.385.6.113.82-.258.82-.577 0-.285-.01-1.04-.015-2.04-3.338.724-4.042-1.61-4.042-1.61C4.422 18.07 3.633 17.7 3.633 17.7c-1.087-.744.084-.729.084-.729 1.205.084 1.838 1.236 1.838 1.236 1.07 1.835 2.809 1.305 3.495.998.108-.776.417-1.305.76-1.605-2.665-.3-5.466-1.332-5.466-5.93 0-1.31.465-2.38 1.235-3.22-.135-.303-.54-1.523.105-3.176 0 0 1.005-.322 3.3 1.23.96-.267 1.98-.399 3-.405 1.02.006 2.04.138 3 .405 2.28-1.552 3.285-1.23 3.285-1.23.645 1.653.24 2.873.12 3.176.765.84 1.23 1.91 1.23 3.22 0 4.61-2.805 5.625-5.475 5.92.42.36.81 1.096.81 2.22 0 1.606-.015 2.896-.015 3.286 0 .315.21.69.825.57C20.565 22.092 24 17.592 24 12.297c0-6.627-5.373-12-12-12'/%3E%3C/svg%3E")
    no-repeat;
}
themeconfig -> navbar에 github link를 설정한다.
navbar: {
  title: 'HELLO',
  items: [
    {
        href: 'https://github.com/greeng00se',
        position: 'right',
        className: 'header-github-link',
        'aria-label': 'GitHub repository',
    },
  ],
},
코드블럭
java나 kotlin의 경우 기본적으로 하이라이팅을 지원해 주지 않는다.
prism 설정을 아래와 같이 변경해 준다.
prism: {
  theme: lightCodeTheme,
  darkTheme: darkCodeTheme,
  additionalLanguages: ['java', 'kotlin'],
}
mermaid
mermaid를 사용하려면 @docusaurus/theme-mermaid 를 설치해야 한다.
yarn add @docusaurus/theme-mermaid
설치 후 아래와 같이 설정을 추가한다.
const config = {
  ...
  markdown: {
    mermaid: true,
  },
  themes: [
    '@docusaurus/theme-mermaid'
  ],
};
themeConfig에서 mermaid의 테마를 지정할 수 있다.
themeConfig:
    /** @type {import('@docusaurus/preset-classic').ThemeConfig} */
    ({
      ...
      mermaid: {
        theme: {
          light: 'neutral',
          dark: 'dark'
        },
      },
    }),
국제화 설정
국제화 설정을 한다면 Older Entries 형태의 설명이 다음 페이지 로 변경된다.
설정파일에서 i18n에 있는 로케일 설정을 ko로 변경하면 된다.
i18n: {
  defaultLocale: "ko",
  locales: ["ko"],
},
블로그 글 author
팀원 별로 문서를 관리한다면 다음과 같이 어떤 팀원이 글을 작성했는지 설정해야 한다.

authors.yml 파일을 이용하여 사용자에 대한 기본 설정을 할 수 있다.
herb:
  name: 허브
  title: Backend
  url: https://github.com/greeng00se
  image_url: https://github.com/greeng00se.png

mallang:
  name: 말랑
  title: Backend
  url: https://github.com/shin-mallang
  image_url: https://github.com/shin-mallang.png
블로그 글을 작성할 때 다음과 같이 authors에 넣어주기만 하면 된다.
---
slug: 1
title: Hello World
authors: [herb, mallang]
tags: [hello, docusaurus]
---

첫 번째 문서 내용